As I talked about in yesterday’s post, I don’t see myself as an expert on blogging. However, when I’ve found something in the blogging world that has saved me a lot of time and has grown to be incredibly useful, I want to share it. For me, that tool has been Tailwind.
What is Tailwind?
We’ve talked about Tailwind on here before. Tailwind is the mega powerful tool that let’s you schedule your pins for Pinterest. But that’s just a simple explanation. It can also help you analyze your profile, pins, and scheduling. It can help you figure out what the best times to post are, what pins you need to replicate, and which of your boards are doing the best. If this is your first time hearing about Tailwind, then I really suggest checking out my first post about Tailwind, which really breaks it down AND helps you set up your account.

The Best Tailwind Tools & Features
In part 1, I went over some of Tailwind’s main features and how to set up your account. Before I go over the newest features on Tailwind, I want to quickly review some of Tailwind’s best tools.
Schedule Pins
Here you’re able to grab pictures from other websites and schedule them to post on multiple boards at once on Pinterest. You can do this through a google chrome extension, pinning from Pinterest, pinning from Instagram, or uploading your own image. You can also create a schedule based on the times that you choose or have Tailwind create a schedule based on what they believe are the best posting times for you.
Pin Inspector
This is a great way to view pins from my website and see how they’re doing on other boards in regards to likes and repins. Additionally, I can use this to see older pins that may need to be repinned.
Profile Performances and Board Insights
These allow me to take a closer look at both my pinterest profile and individual boards to see exactly how well things are actually going. You can check your pinterest followers and check in to see if you’re growing at a steady pace. The board Insight is really interesting because it also allows you to evaluate the group boards that you’re apart of and you can see if participating in those groups are really worth it.
Tailwind Marketing Tips & New Tools
Now the good stuff. It’s time to get into each of Tailwind’s new tools, how you can get them set up, and how you can use them to best market yourself.
Tailwind Tribes
Tailwind found a way to take group boards and make them 20 times better. Tribes are a group of like-minded Tailwind users who join a group to share their content and re-share the content of the other members of the group. (Just a note, you can only use Tribes if you’re a paid Tailwind user. You can test it out during a Free Trial, but you’ll have to pay to continue using it. But trust me, it’s worth it!)
We’ll go over how to join one before we discuss how to utilize it.
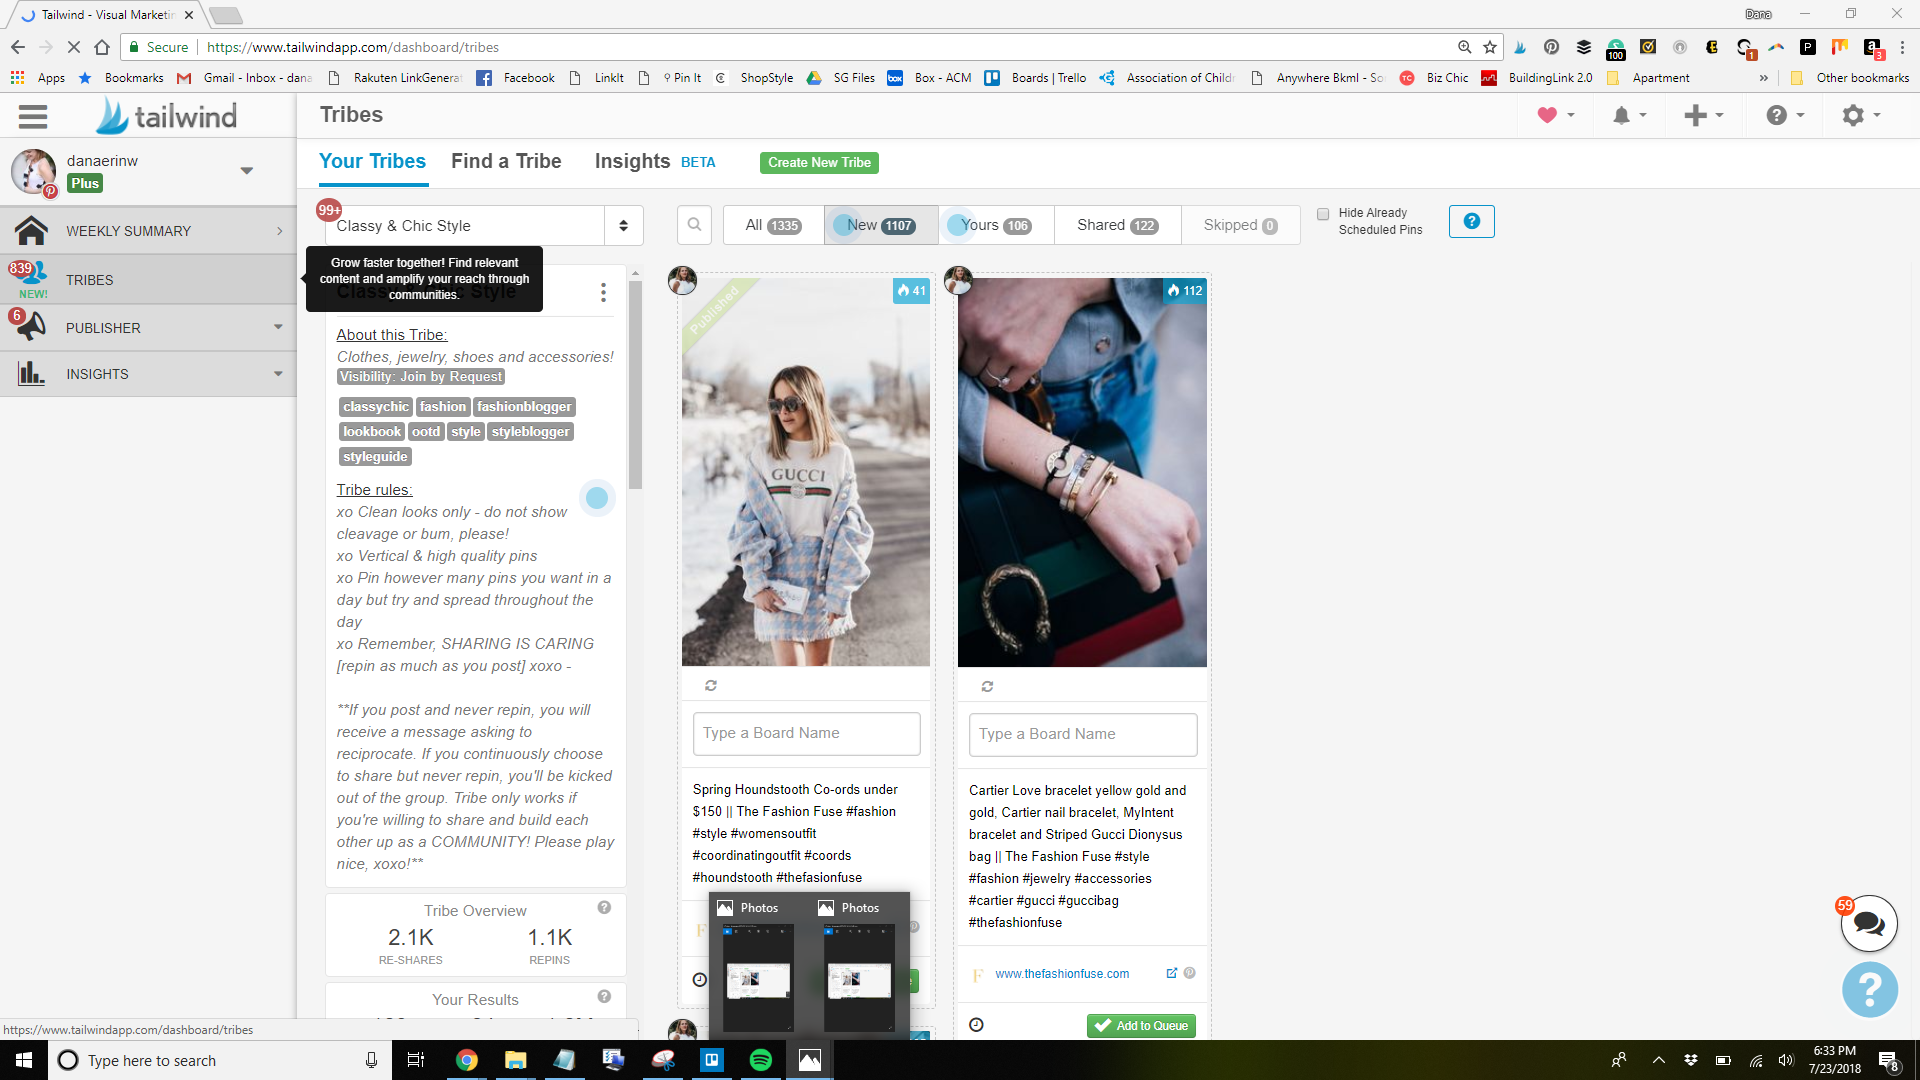
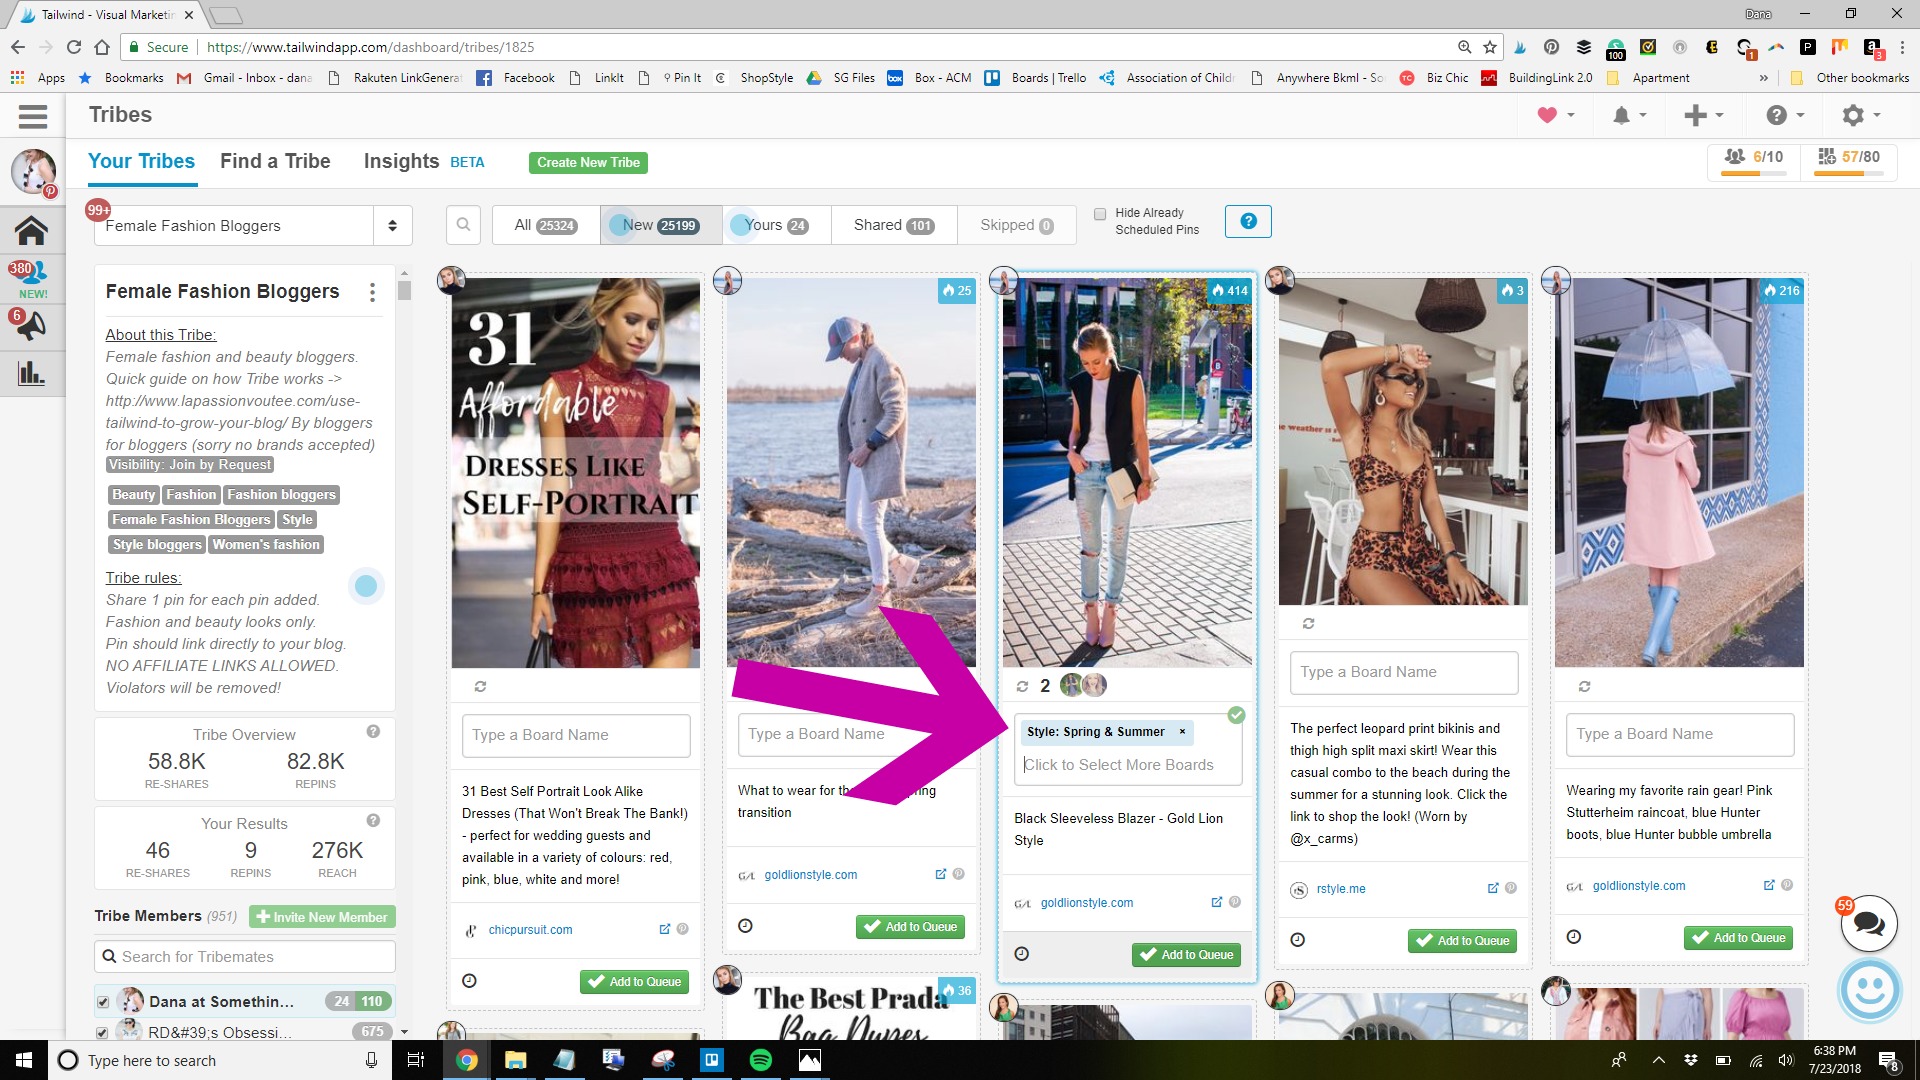
- First, you’ll see on your sidebar the new tab for tribes! Click on it. Mine already has a board that populates, but you’ll likely have the search engine pop up (or Tailwind asking about your interests, just skip it).
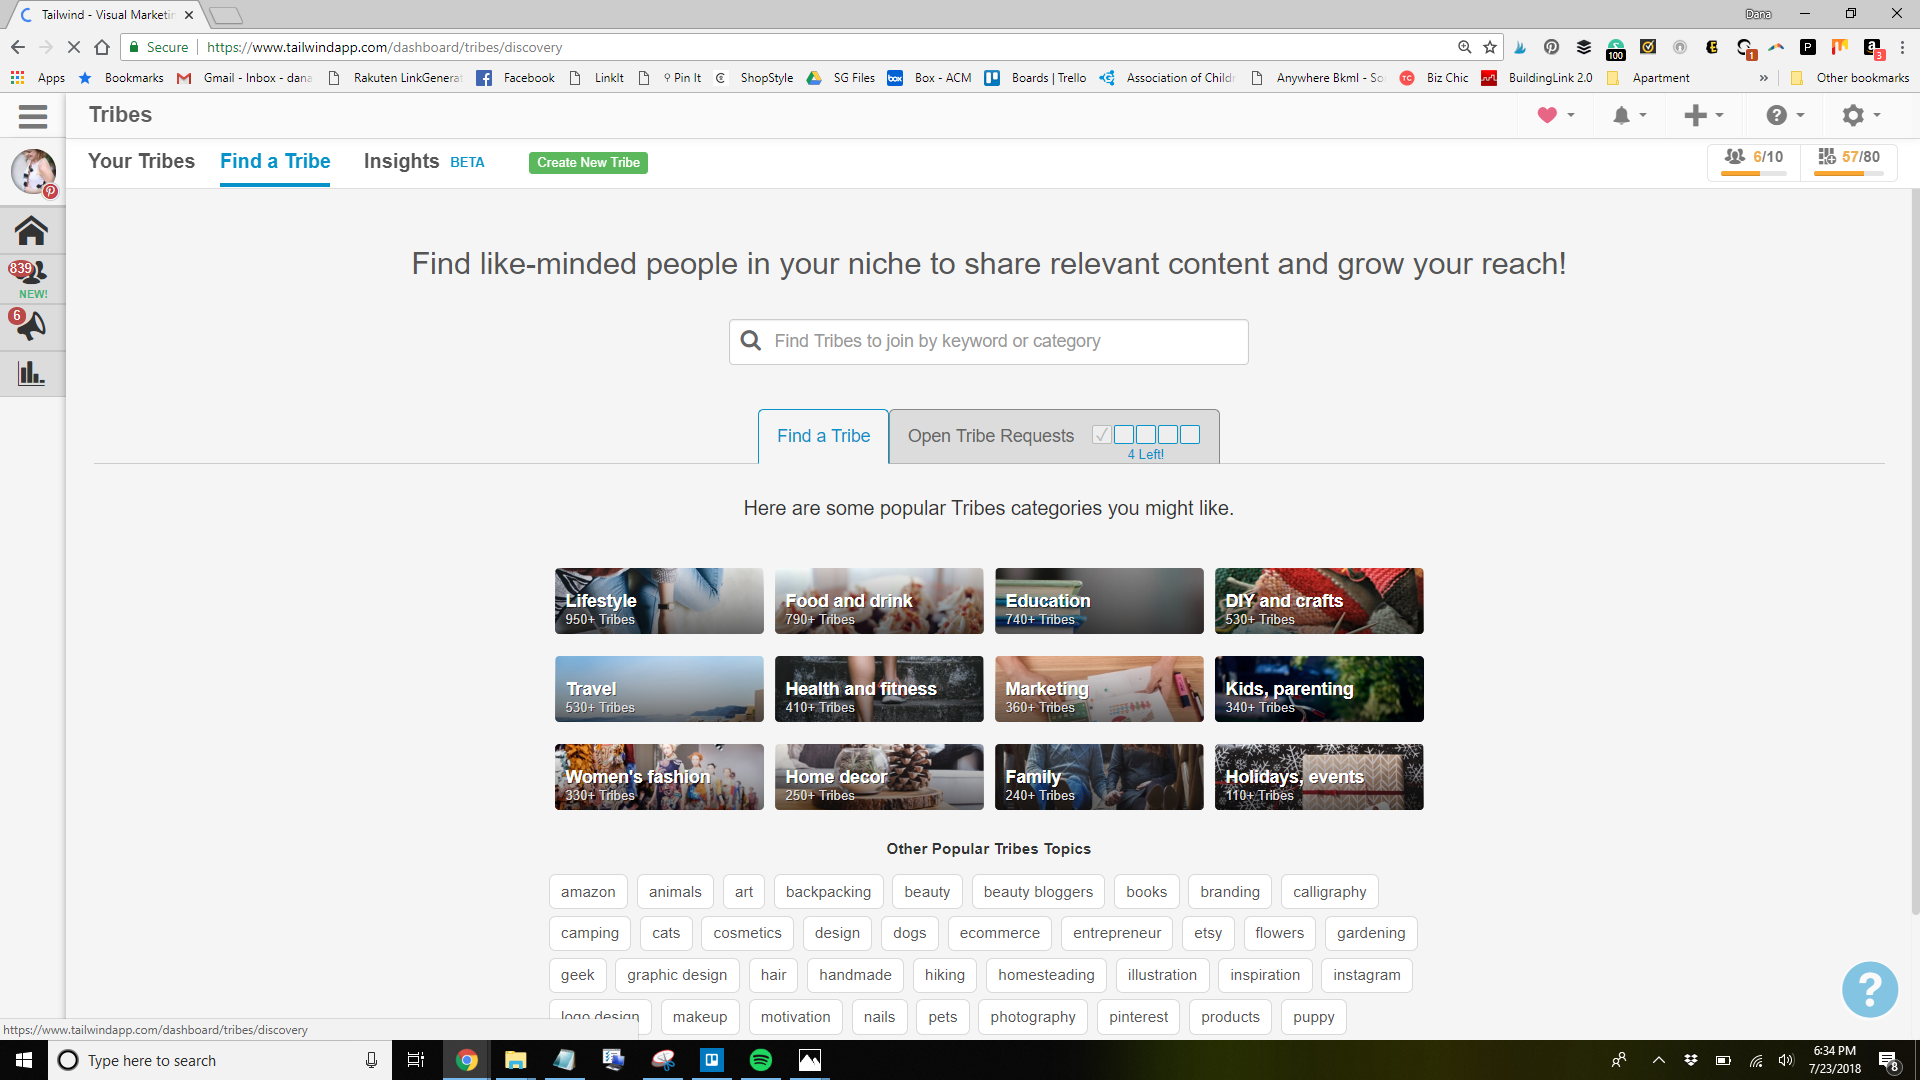
- In the search bar, enter a broad term for one of your major board categories. For example: fashion, beauty, books, recipes, etc. Keeping it broad will get you more board options.
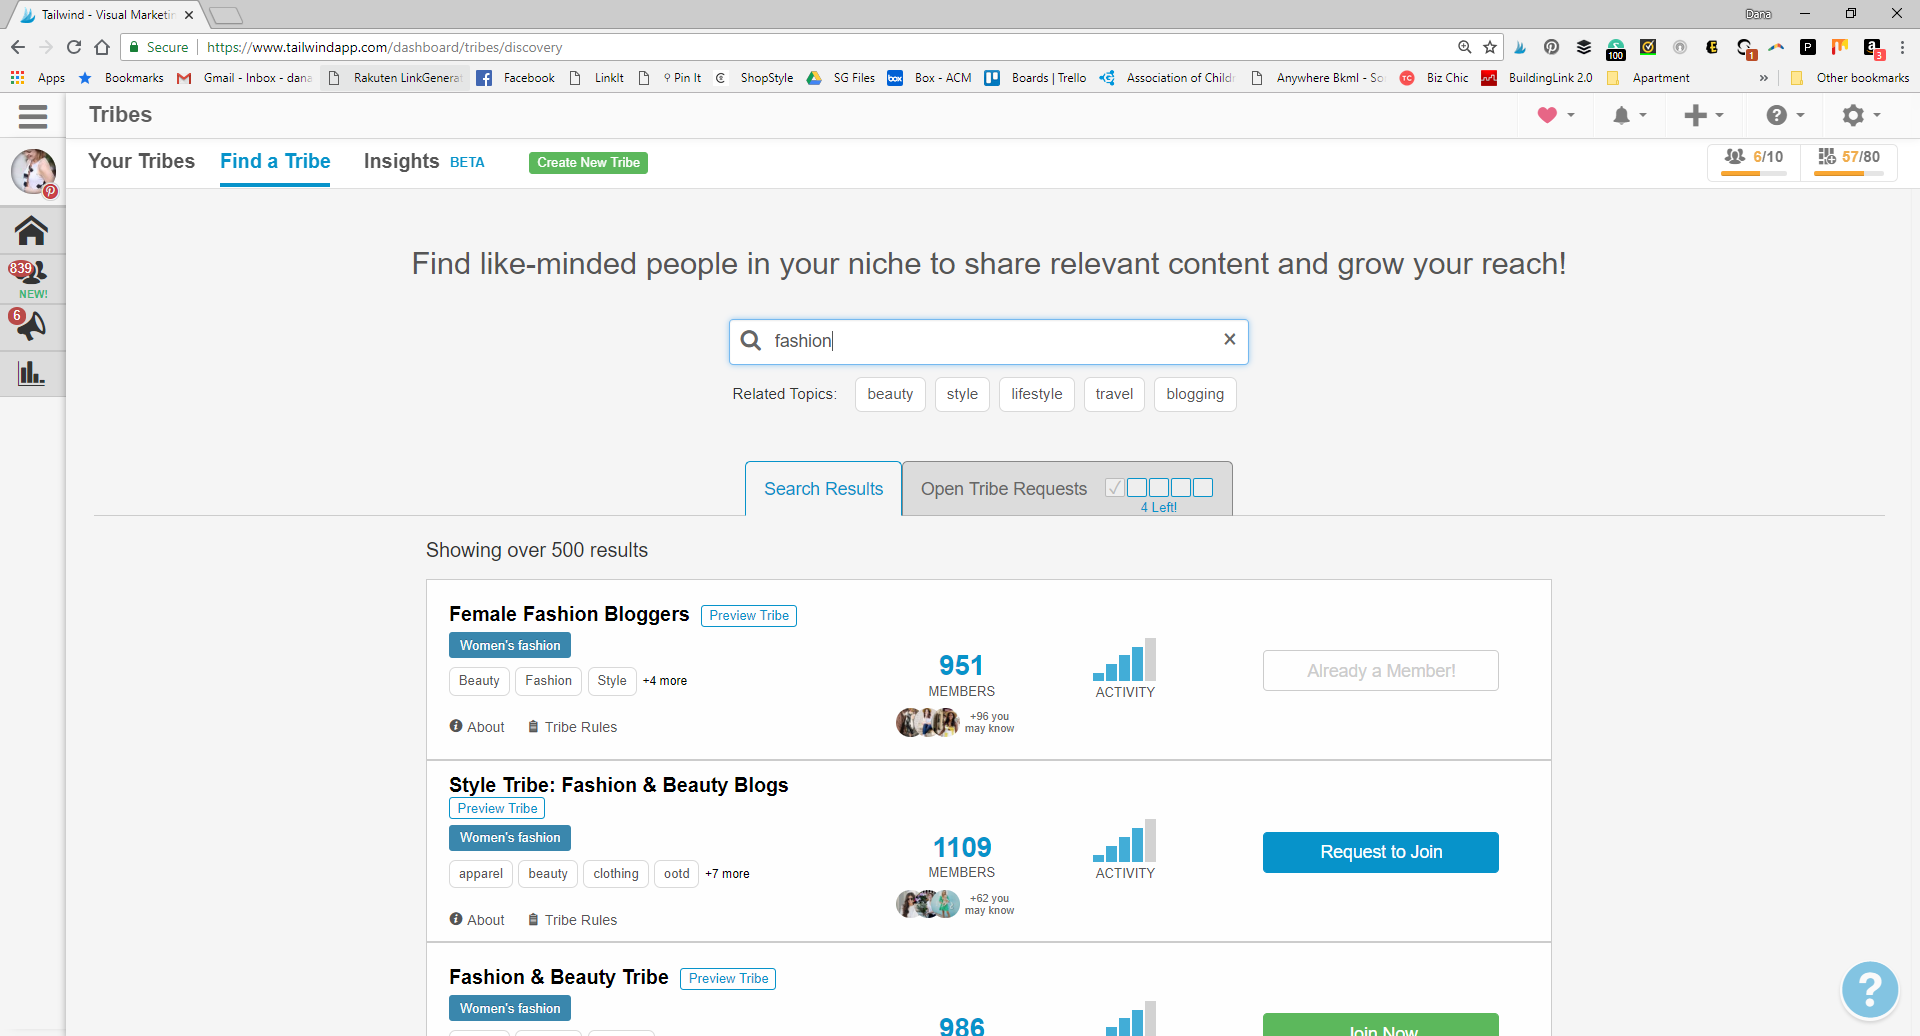
- When you’re looking through the tribes to join, you want to keep a few things in mind. First, you only want to join a board with a high engagement rate: 4/5 or higher! If the members aren’t engaged, then joining the board is a waste of your time. More members is preferable, since that can be a potentially bigger reach, but there’s no harm in testing it out. Remember though, you can only join a limited number of groups.
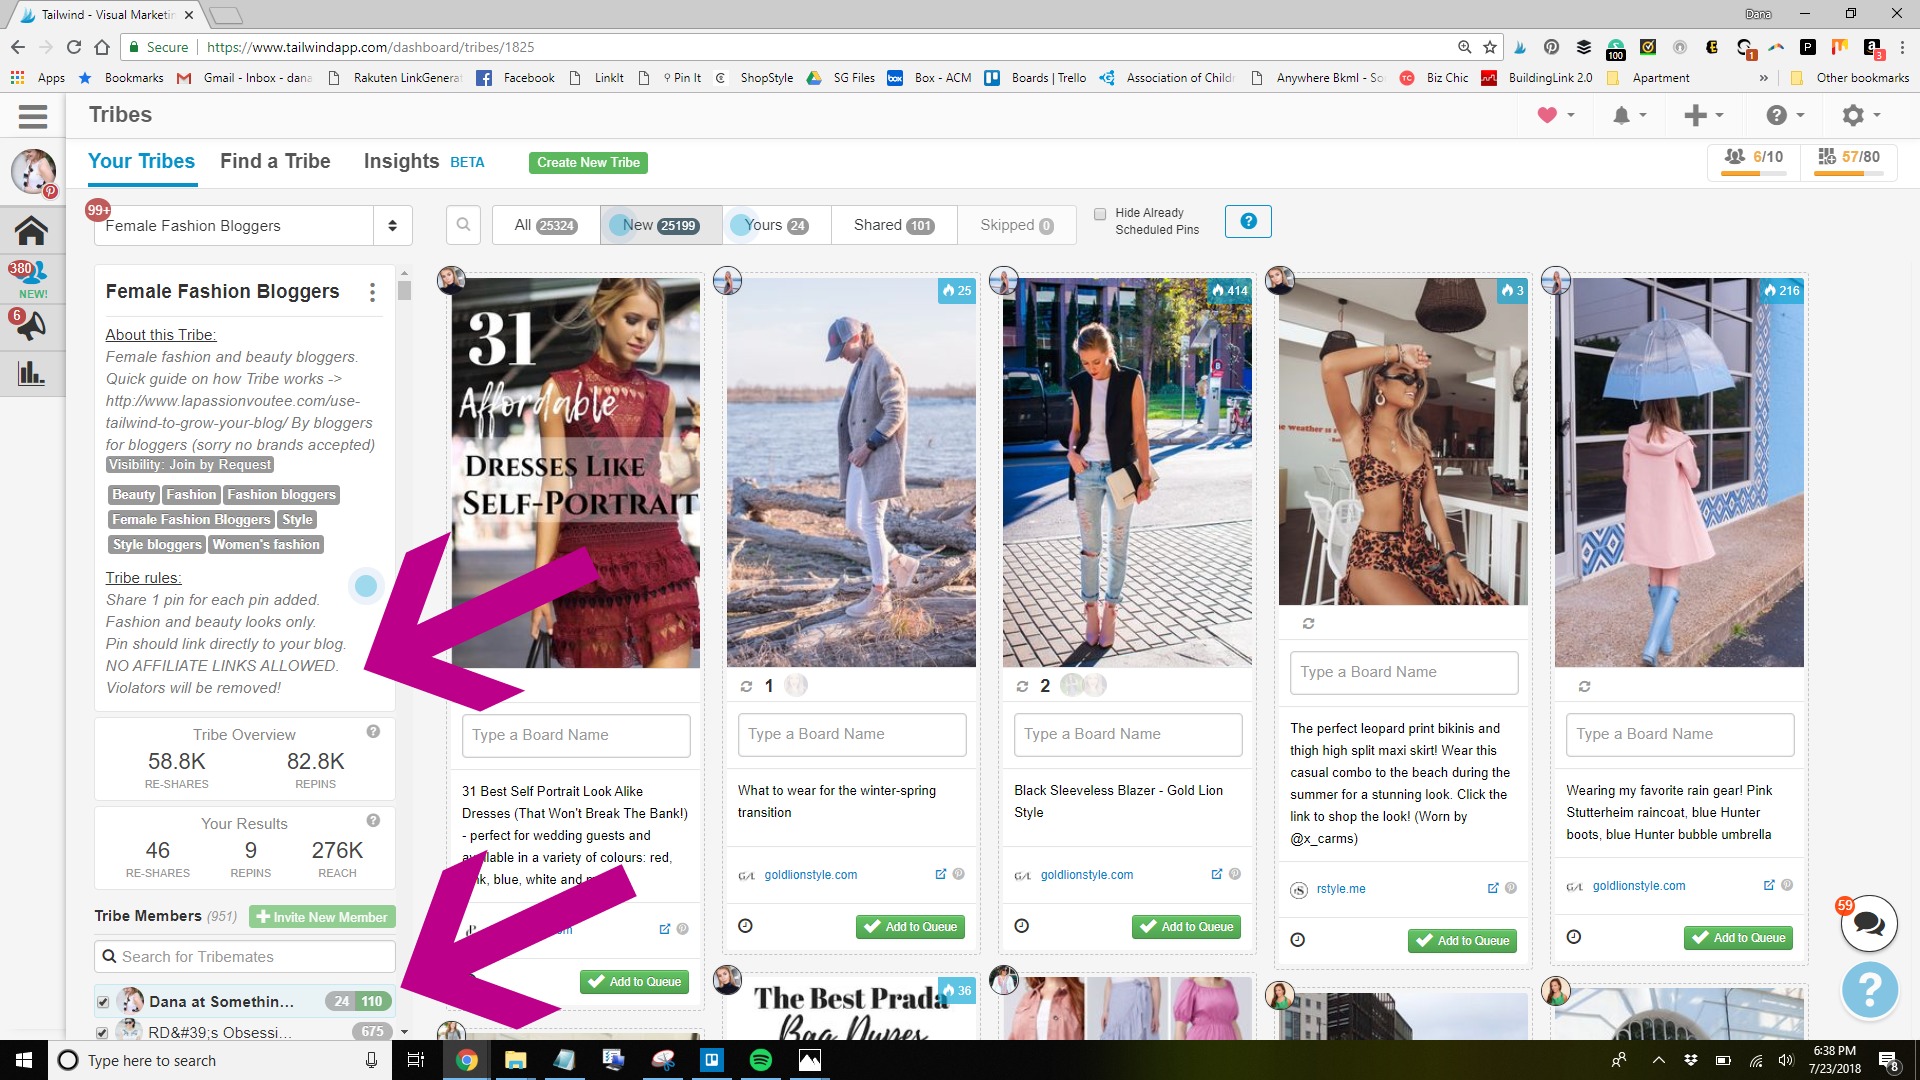
- Once you join a tribe, you have to make sure that you follow the rules of the tribe. Typically, this relates to the number of pins you share/add. Luckily, you can easily check that by looking at your name under tribe members. As you see, I have added 24 pins to this tribe, but I’ve shared 110 pins from the tribe (so I’m pretty safe). Honestly, most of the tribe rules are pretty easy to follow and they’re there for your benefit. Tailwind wants to make sure that your content gets shared and you’re not just there to leech off of others’ goodwill. It’s also helpful because you can see in “Your Results” how well your pins are doing when you share them. Looking at them right now, this is telling me that I really need to start sharing more to this group! I have a pretty good reach when I do pin to them!
- Pinning from Tribes is pretty easy as well. You just find a pin you want to share, begin typing in the board name, add it in, and click add to queue! Simple as that!
So how can this Tailwind marketing tool be used to your advantage?
Oh my friends. Tribes is like gathering around your best group of bloggers, taking your best picture from your best blog post, and going, look at the amazing work I just did. Despite how members are in a tribe, I never feel like I miss a pin from a Tribe and the ones that stand out, REALLY stand out.
This is your opportunity to really find your best content, make the text as pinterest friendly as possible, and share it to tribes. These tribes are also amazing for fixing up old content and sharing it to these groups. Odds are, these bloggers haven’t seen your content before. So now is the best time for you to re-do your posts, make your pins more pinable, and have these bloggers promote your blog posts for you.
Board Lists
This is the simplest Tailwind tool, but also the biggest lifesaver. Board Lists allow you to put your boards into different lists. Then, when you’re pinning a pin, you don’t have to add one board at a time, but instead, you can add multiple boards with one click! I prefer to make these lists by my blog categories, but really, you could do whatever you want. Either way, these lists are timesavers.
Getting them set up is super simple, so let’s get started.
- First, back in the main menu, you’ll see under the Publisher Tab, the option to click on “Board Lists.” Click on it.
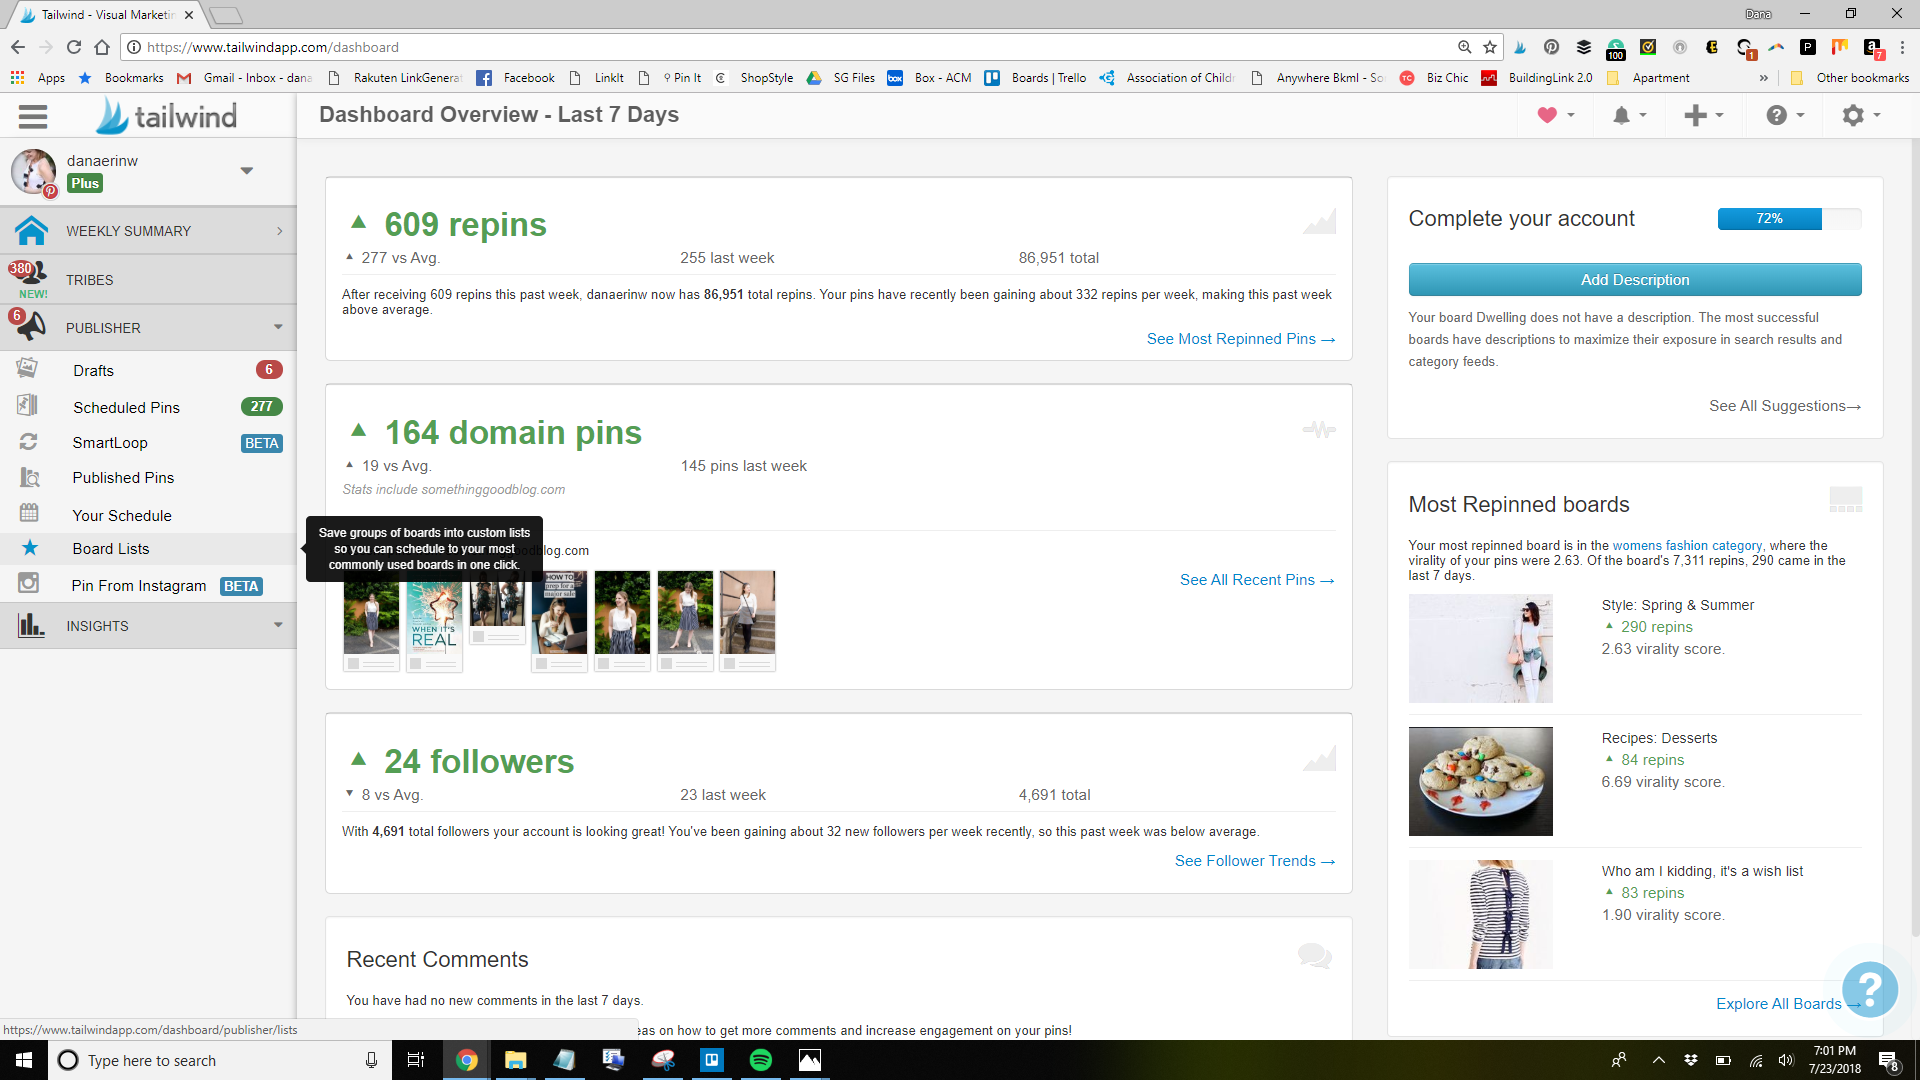
- As you can see, I already have a number of lists set up. I chose to do mine based on the main categories of my blog that I’ll typically pin in large batches. For you to make your first list, click on the dashed line block that says “Click to add a list.”
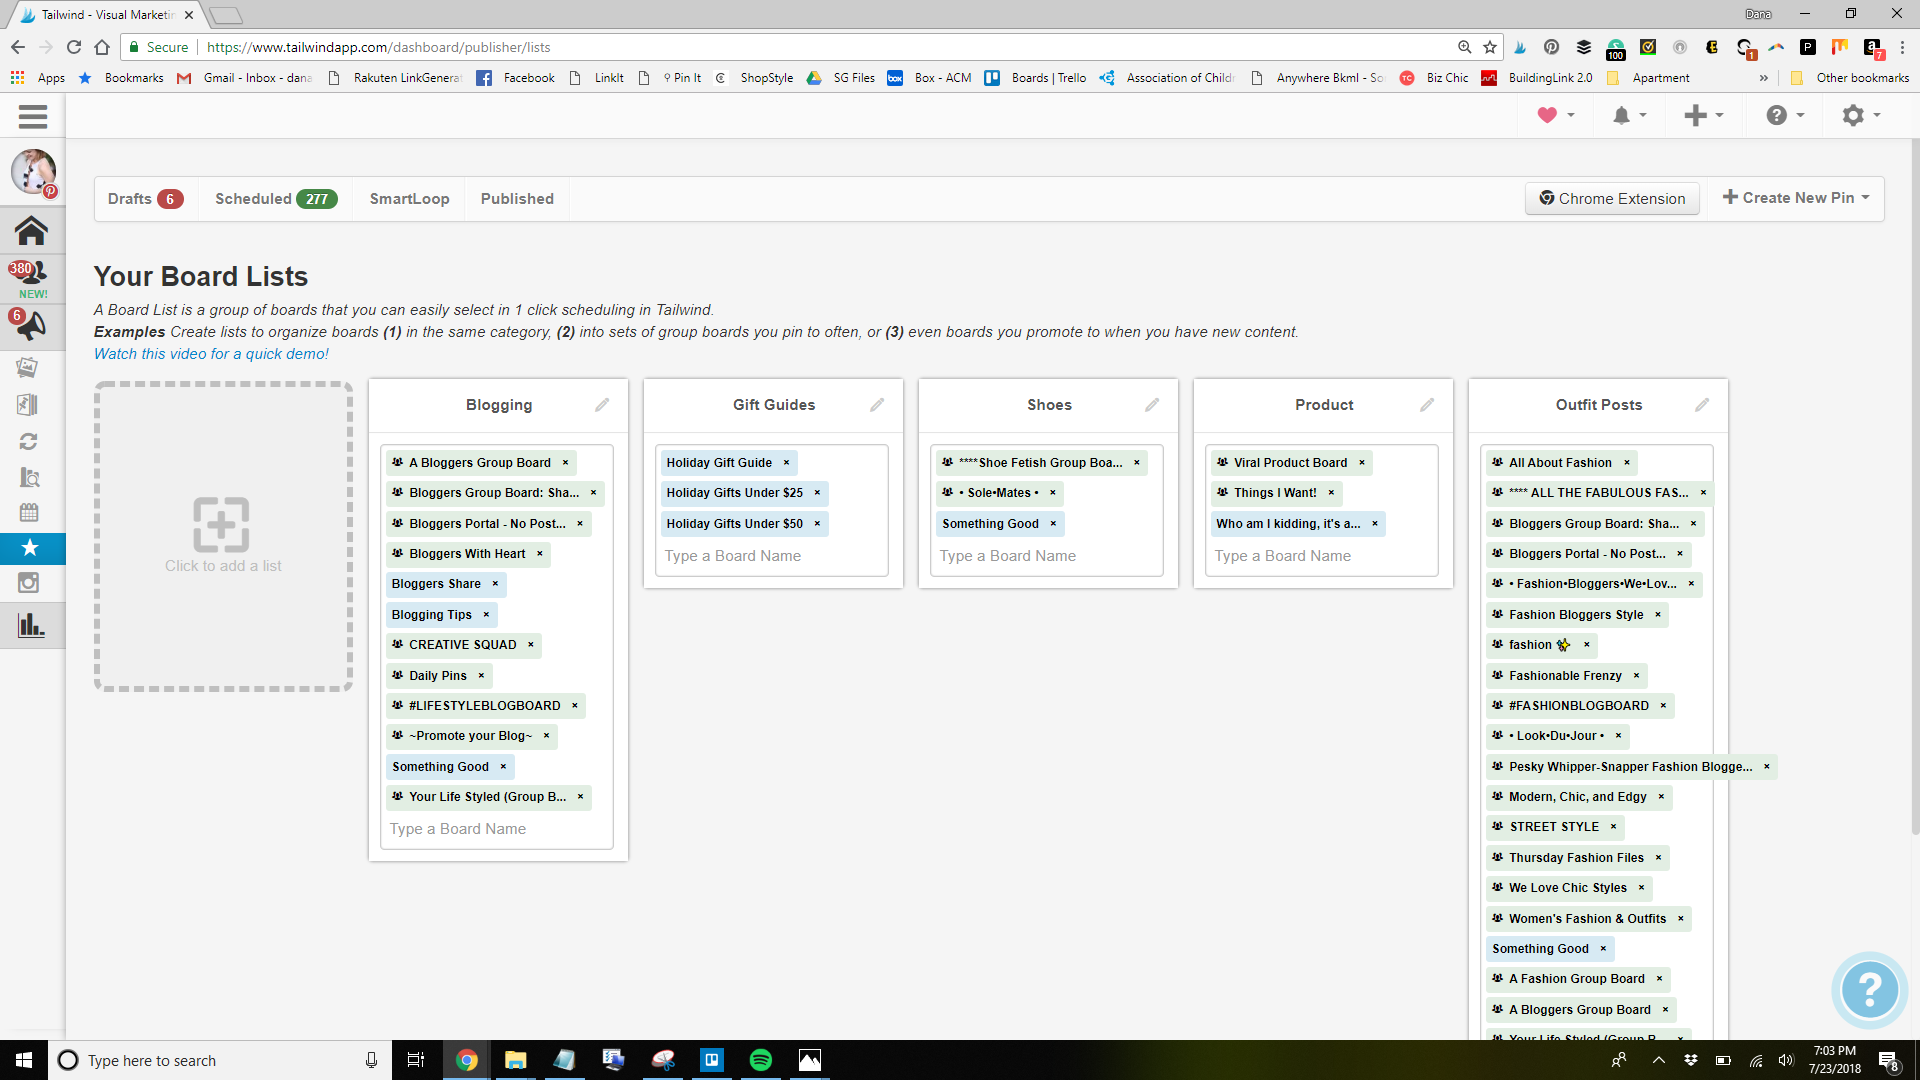
- Where it says “New Board List” type in your category. I decided to make mine about books.
- Then, where it says type a board name, just start typing in names of your boards. Or you can just click in there and start clicking on boards you want to add.
- Once you’re done adding boards to the list, just click off of the list into the gray area. That’s it, you’re done!
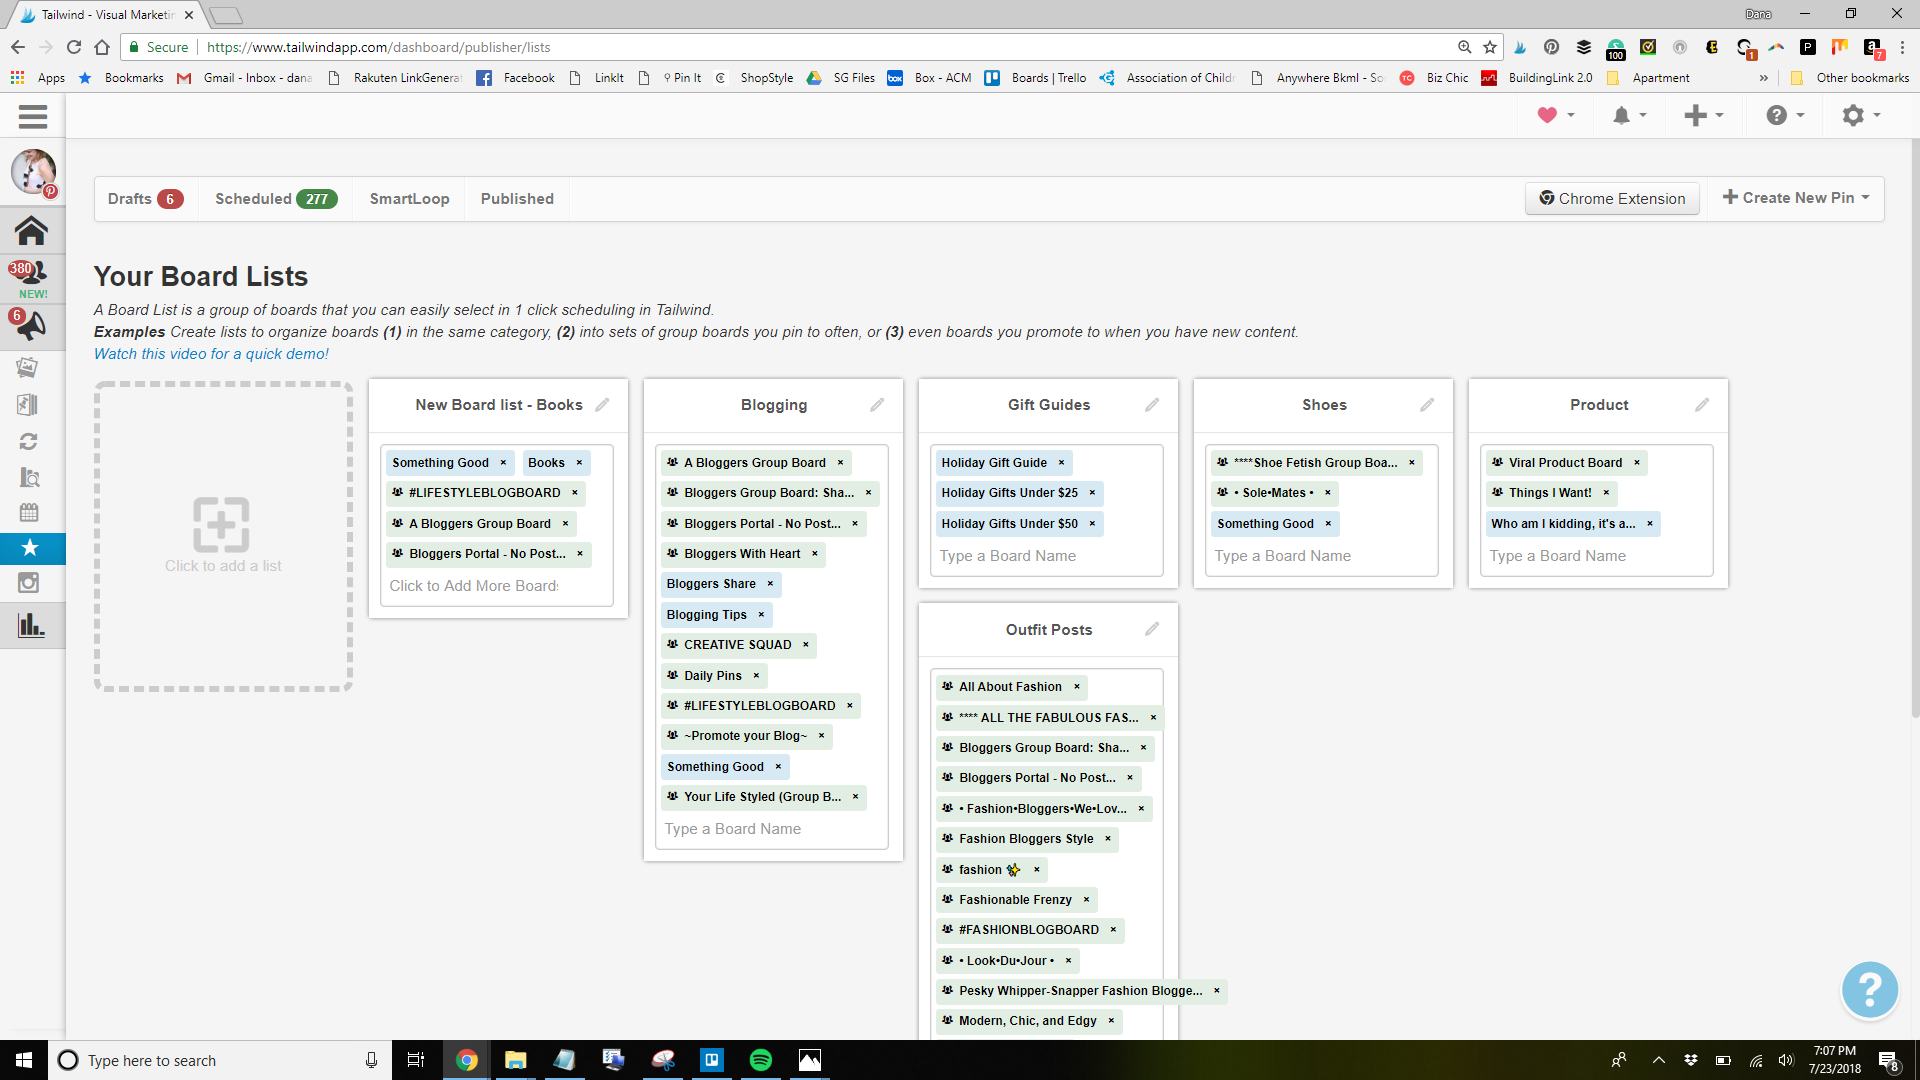
- Next time you go to pin anything through Tailwind, you’ll see your lists auto-populate at the top with stars next to them. Once you click on a list, all of the boards will be added to the pin at once! If you want to delete one of the boards from the list, you can just x that one out and remove it.
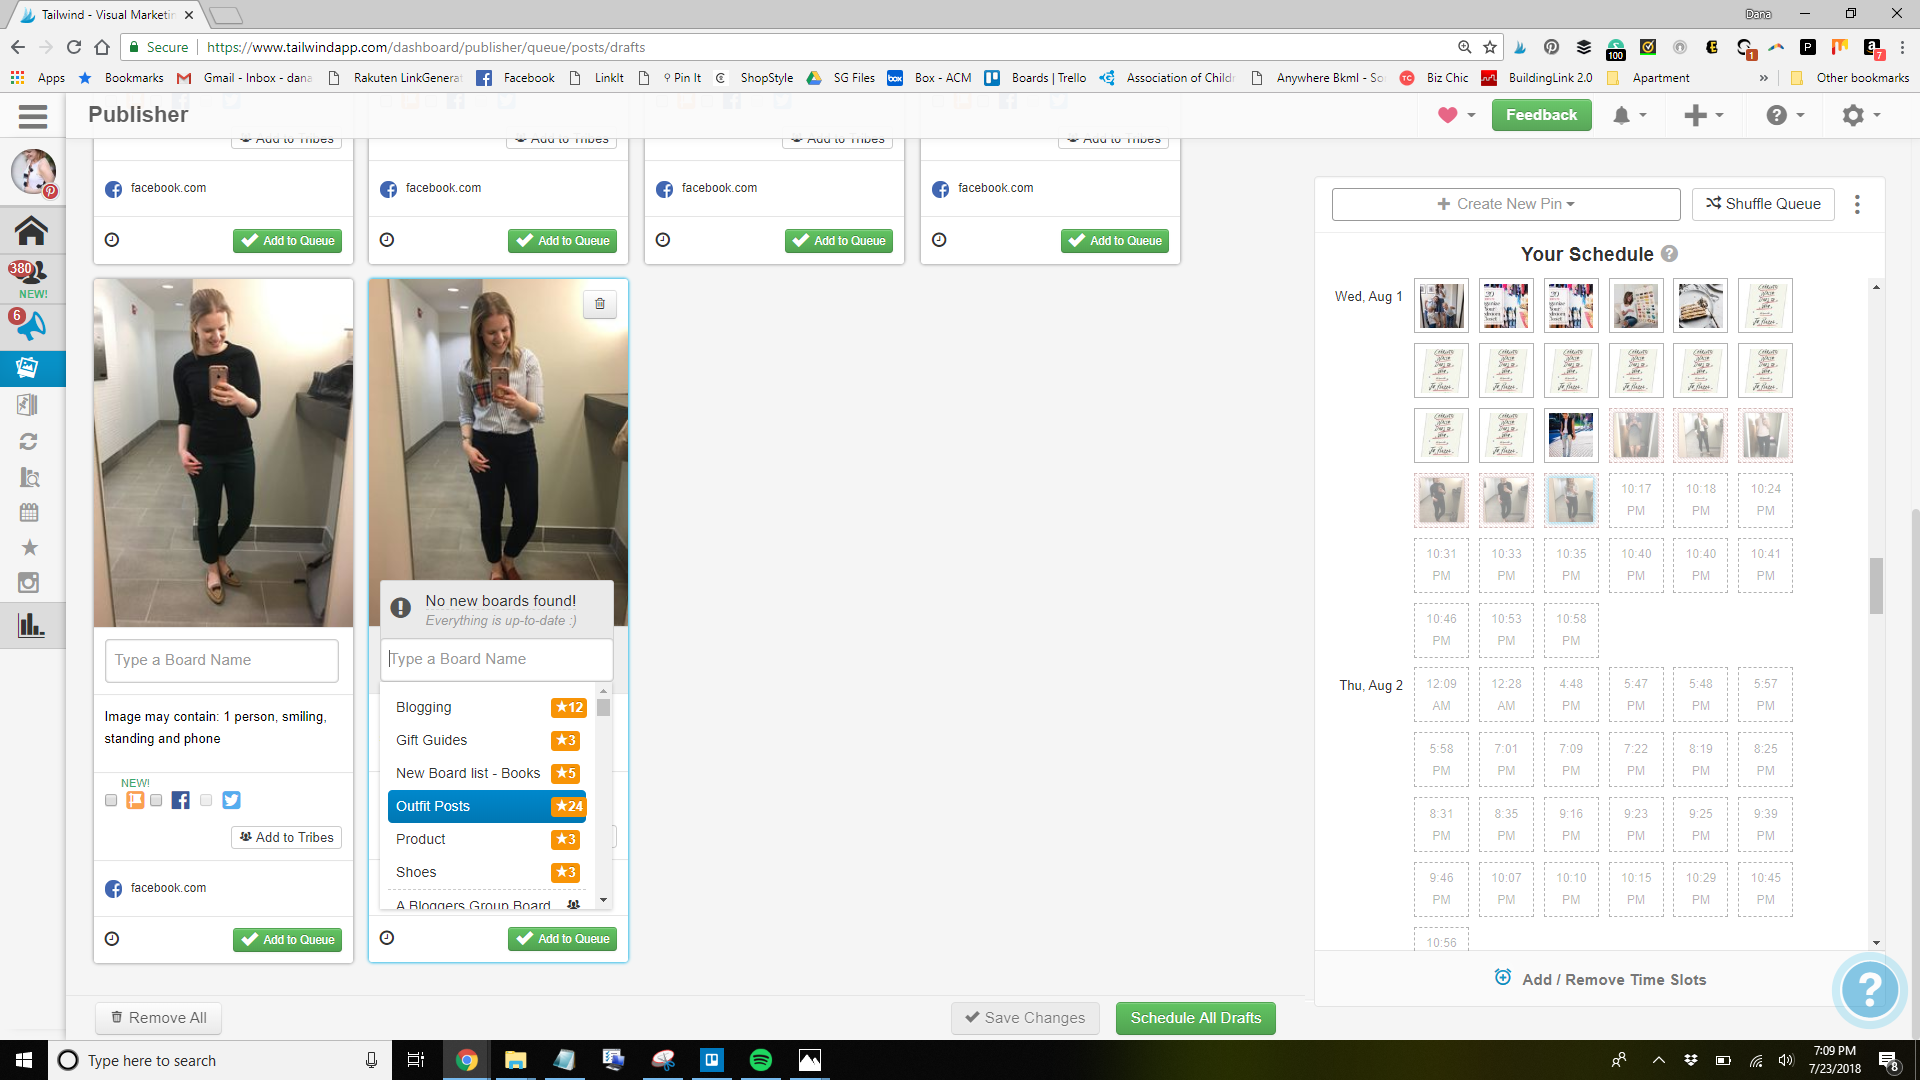
How can board lists help you with marketing?
Board lists are a great way to refine your marketing strategy. Instead of shooting your pins out into the wild, you’ll have a set plan with every pin you send out. You can know that every pin will have a specific list of boards that it needs to go to which will help promote you. You no longer have to worry about missing a board or forgetting to pin something somewhere because it’s all already set up for you. Additionally, I like to set up a board that only has pins from my blog and then add that board to all of my lists. That way, my blog board is always getting all of my pins.
Looping or SmartLoop
So Tailwind is about to officially add in their own tool for looping now that BoardBooster is gone, but until that’s in place, there’s an easy way to loop pins on your own.
- Head back over to the pin inspector and filter the results so it only shows pins from your website. You can also do this by board, it’s your decision.
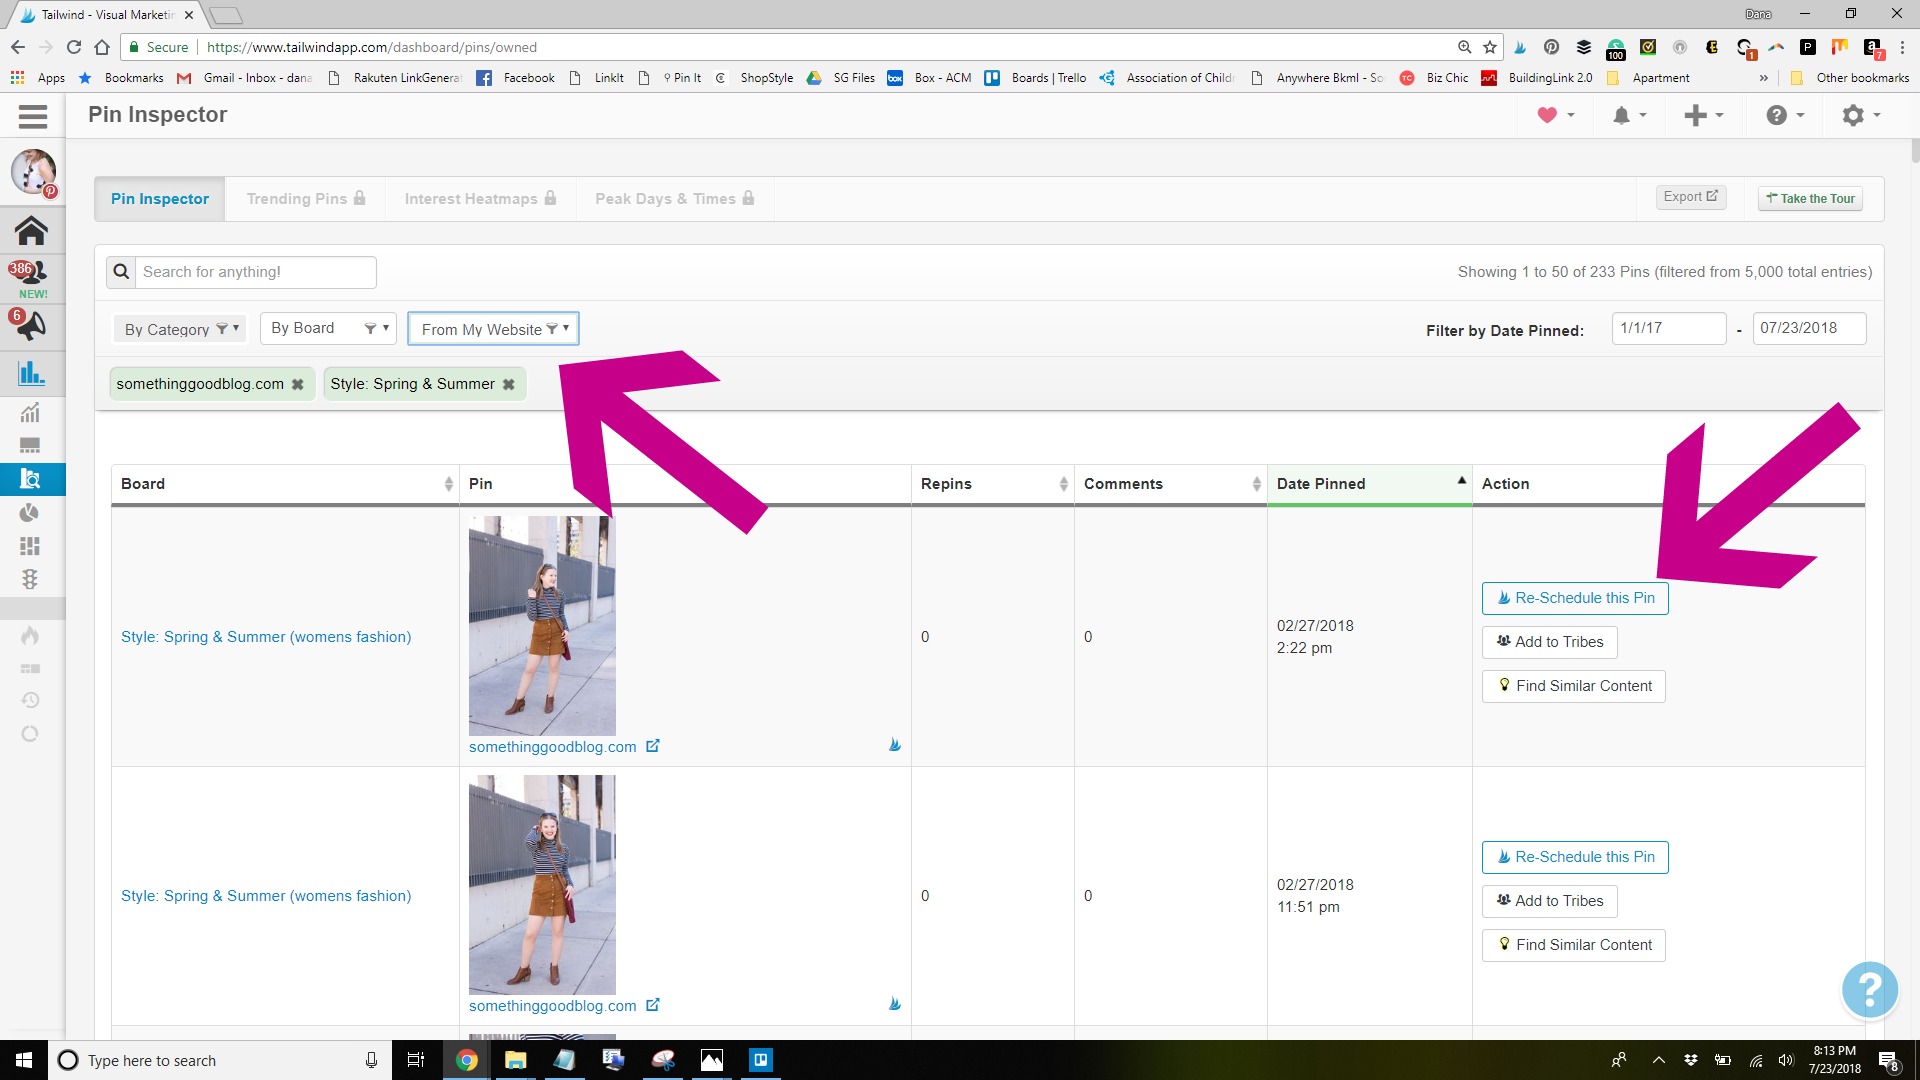
- Then, sort the board by last date pinned. You’ll then start looking for boards with a low number of pins.
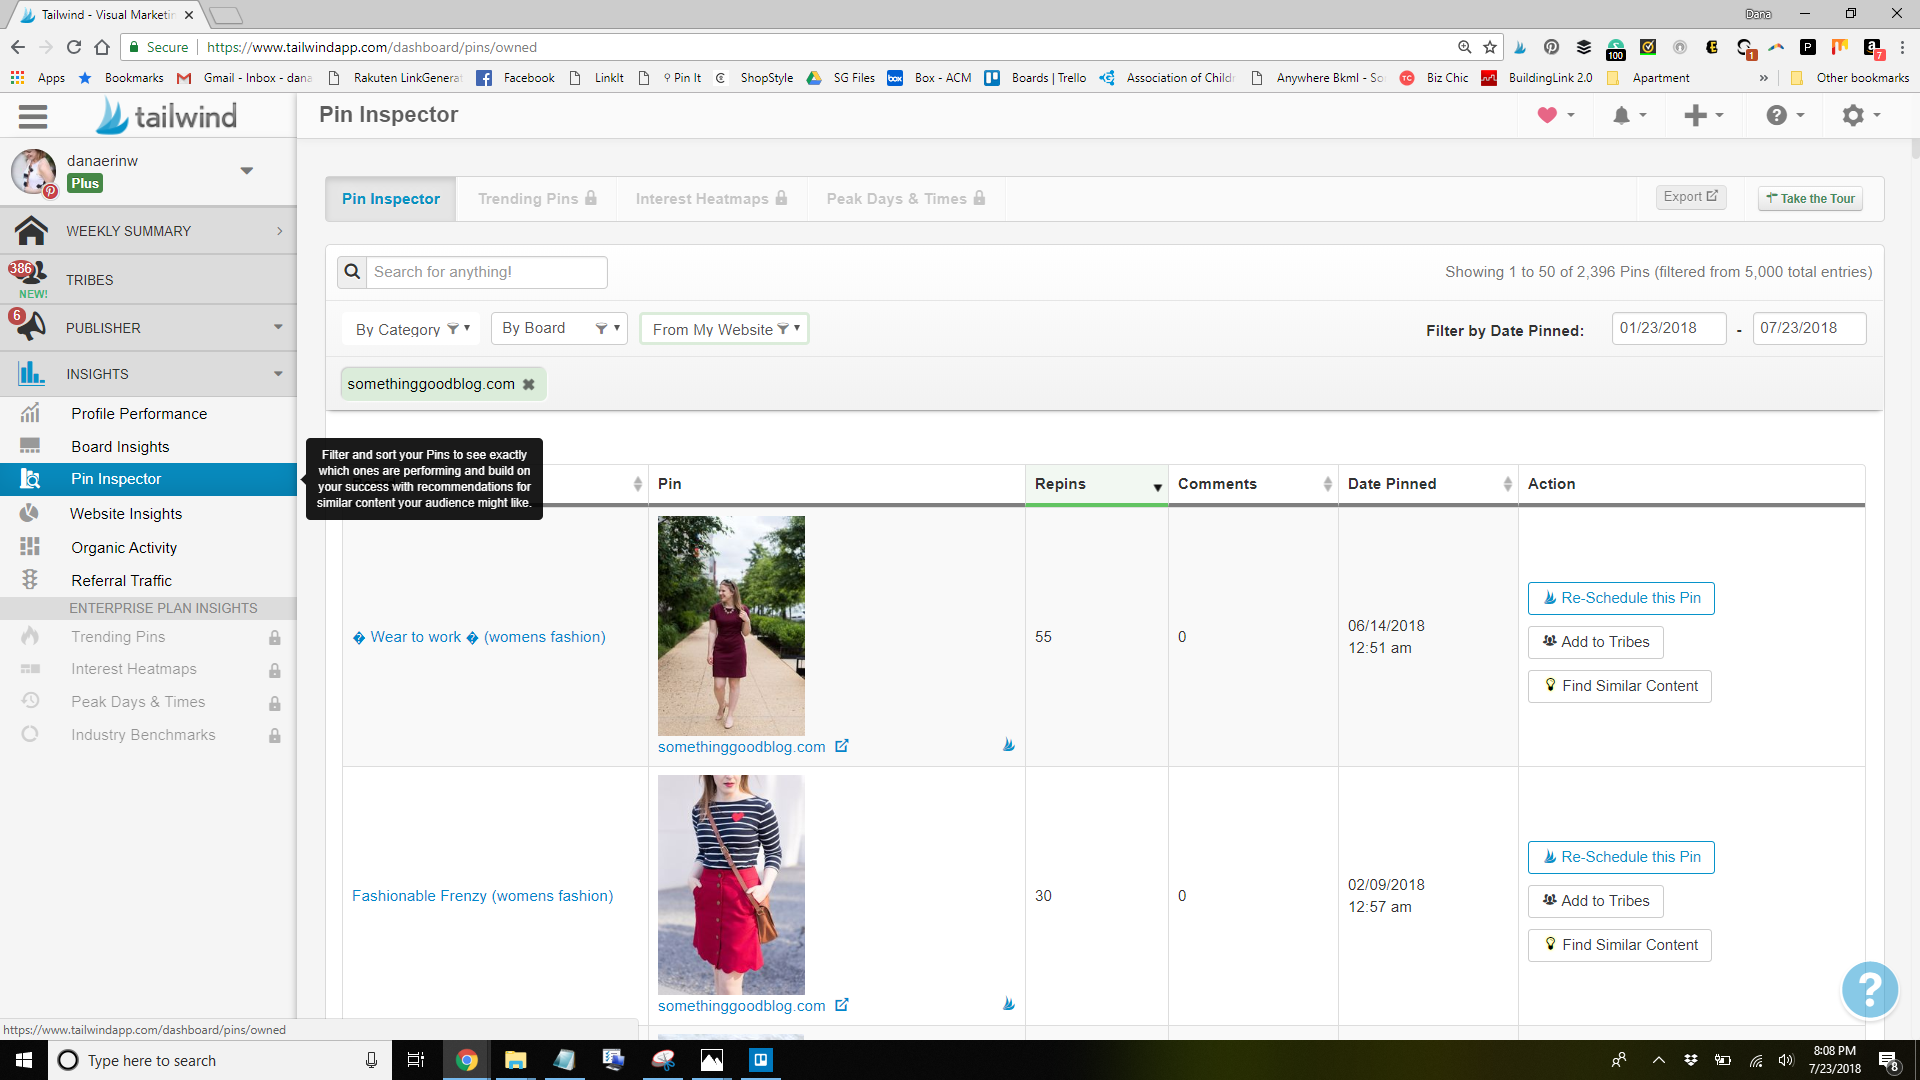
- On the far right side of your screen, you’ll then click re-schedule this pin. When the options come up, click the name for the same board. Then schedule it. You’ve now looped your first pin.
How does Looping help you with marketing?
This might seem counter intuitive to everything you’ve been told about pinning before, right? After all, aren’t you supposed to delete double pins? Don’t you not want to have pins with no repins? Well it’s time to throw that all out. After reading through Tailwind’s blog post, I’ve discovered that that thinking is apparently all wrong.
Re-sharing a pin after a long amount of time isn’t spammy. In fact, it’s a great way to bring back content to the top. Plus, unlike google, Pinterest won’t penalize you for duplicate content. In fact, 80% of the content on Pinterest is repins. So why are we all so concerned about repinning our own content?
I think I’ve loaded you with enough Tailwind marketing tips to think about and a long to do list.
So I’m going to stop here. I hope this post has been further insight for you about how helpful a tool like Tailwind can be to help grow your brand on Pinterest. It can definitely be intimidating in the beginning, but if you slowly work your way through it, you’ll soon find yourself feeling more confident on it and seeing growth within your account.
If you have any questions about the tools I’ve discussed here or any other Tailwind related questions, feel free to email me or reach out in the comments below!


Comments
Comments are closed